
'Tartelette' palette purple smokey eye tutorial!

Hello my lovelies! I'm sorry for the week off, but this will be uploaded before I go away for another two weeks! As I don't have a laptop, just a desktop, I'm going to struggle to upload something, or anything at all, due to only having my phone and the lack of wifi in Sardinia.. Although I may be able to schedule one throughout the time that I'm away. ANYWAY! Today I am back with a tutorial, focusing on the eyes. As a late birthday present from my auntie, I got the Tarte 'Tartelette' Amazonian clay matte palette and I am in love with it. I had read many many reviews before I received it, and knew before I had used it that it was going to be amazing. Before I start to babble on for far too long, let's get on with it!
So I started by prepping my eyes with Mac 'Soft Ochre' pro-long wear paint pot which I seem to live by at the moment, and then set the cream with the colour 'free spirit' from the tartelette palette.


I then quickly filled in my brows using the colours 'primal' and 'undone' from the Naked two basics palette. Recently, I have been loving using the lighter colour (primal) on the inner part of my brow, and then using the darker colour (undone) to really shape and define the outer part of my brow. I used the zoeva 317 brush to fill them, and then a Normal spoolie to distribute the pigment throughout the whole brow. Then to finish them off, I used my Maybelline 'Brow drama' in transparent, to set my brows and make sure the hairs stay in place.


Now, on to the focal point of this makeup look, the eyes! All of the eyeshadows used here are from the 'Tartelette palette', to show that with one palette, you can make amazing eyeshadow looks. I started off by taking the colour 'natural beauty' on the zoeva 227 and running it in windscreen wiper motions in my crease and then just blending it out to my brow bone, to act as a transition shade for the darker shadows. I really blended out the edges to get rid of any harsh lines and I did this with my angled shadow brush by Real Techniques. I then took the colour 'best friend' on my Real Techniques base shadow brush and ran this through the outer edge of my crease to add some definition, and also brought it round to darken up the outer-V of my lid. I then, once again, blended it out to make the colours looked more natural. Then taking the second darkest shade 'bombshell' and using the zoeva 231, I focused on the outer-V, and blended down on to the outer part of my lash line. I then took the colour 'caregiver' and again, using the base shadow brush, put this colour in the centre of my lid to open up the eye and smoke it out even more. Lastly, I took a small angled brush, and the darkest colour, and ran it along my lash line to add some more deffinition. Then, to finish it off, I took my angled shadow brush and blended the whole thing to make sure all the harsh lines were gone, and all the individual colours were blended into eachother enough.


Now, for the rest of my face. I spritzed my Smashbox water primer all over my face, and whilst letting then sink into my skin, I wet my beauty blender (Miracle Complexion sponge) so it expanded in size, and then dried it as much as I could using a towel. Now that my face was dry, I took my new L'oreal 'Infallible matte' foundation in the shade '20 Sand', and using the damp beauty blender, applied it all over my face, making sure to blend into my neck as well.


Then I concealed and highlighted with the Naked Skin concealer in 'fair neutral' and again, blended it in with the beauty blender to give my skin a more flawless finish.


Then to set my concealer, I used the Rimmel stay matte powder in 'transparent' on a Real Techniques contour brush. I put this in all the places I put my concealer, so under the eyes, my forehead, my chin and my nose.


Then, as usual, I used my Mac studio fix powder on the zoeva 106 to set the rest of my face.


Next, I used a new product, the L'oreal 'glam bronze terra bronze' and a small fluffy brush to really bronze up my jawline and hairline to give myself a naturally tanned look. I have loved using bronzer recently as opposed to contouring, as I feel it's much nicer for summer as it makes you lovely and sun-kissed.


I then applied a small amount of my 'Do it again' blush by topshop, with a Real Techniques cheek brush. For my highlight, I used the Makeup Revolution vivid baked highlighter in 'golden lights' and applied this with a real techniques contour brush. I put this all along my cheek bone and blended it all to cancel out the harsh lines.

Then to highlight around my eye area, I used a small amount of concealer on the Revolution pro brush to accentuate my brow bone, and then on top of that, I used the Iconic Pro palette by Makeup Revolution and the colour 'need' to highlight my brow bone, inner corner and cupids bow. Then lastly for eyeshadow, I used a small brush and the colours 'natural beauty' and 'bombshell' and ran them under my bottom lash line to intensify the colour and really make it smokey.

For my mascara, I curled them as usual, and then used the 'Sumptuous' mascara by Estēe Lauder and then Benefits 'They're Real!' over the top to lengthen and volumize my lashes. I also used this on my bottom lashes.

Now for the lips. I just used a cotton bud and my Garnier 'Micellar cleansing water' to clean off all the foundation from my lips, and used my baby lips to moisturise. I then took the Mac lipliner in 'Dervish' and lined my lips, and then took Mac satin lipstick in 'faux' and completely filled them in.


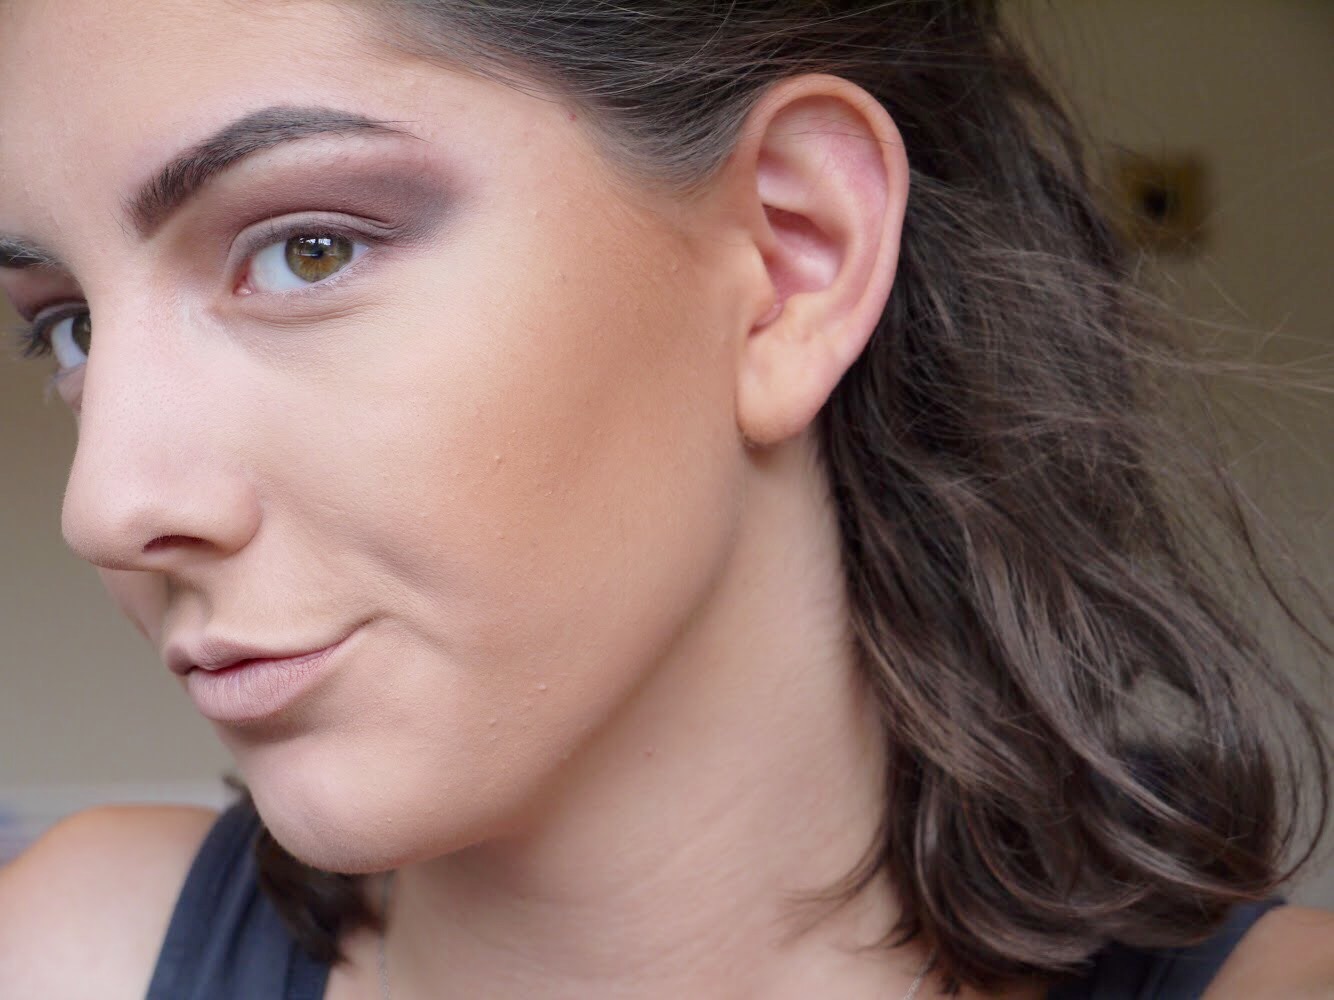
And this is my finished makeup look! I hope you enjoyed reading this post, as I have a few more makeup tutorials on the way! If you did like it, then comment down below any other suggestions, and if you have any good eyeshadows you think I should try out, leave that below as well!
Until next time..


Then to highlight around my eye area, I used a small amount of concealer on the Revolution pro brush to accentuate my brow bone, and then on top of that, I used the Iconic Pro palette by Makeup Revolution and the colour 'need' to highlight my brow bone, inner corner and cupids bow. Then lastly for eyeshadow, I used a small brush and the colours 'natural beauty' and 'bombshell' and ran them under my bottom lash line to intensify the colour and really make it smokey.

For my mascara, I curled them as usual, and then used the 'Sumptuous' mascara by Estēe Lauder and then Benefits 'They're Real!' over the top to lengthen and volumize my lashes. I also used this on my bottom lashes.

Now for the lips. I just used a cotton bud and my Garnier 'Micellar cleansing water' to clean off all the foundation from my lips, and used my baby lips to moisturise. I then took the Mac lipliner in 'Dervish' and lined my lips, and then took Mac satin lipstick in 'faux' and completely filled them in.


And this is my finished makeup look! I hope you enjoyed reading this post, as I have a few more makeup tutorials on the way! If you did like it, then comment down below any other suggestions, and if you have any good eyeshadows you think I should try out, leave that below as well!
Until next time..

0 comments:
Post a Comment